This post contains affiliate links. Please read our disclosure policy.
These freshly milled flour Hawaiian rolls are perfectly fluffy and sweet! With freshly milled hard white wheat berries and pineapple juice for lots of tropical flavor, these Hawaiian rolls are purely delicious.
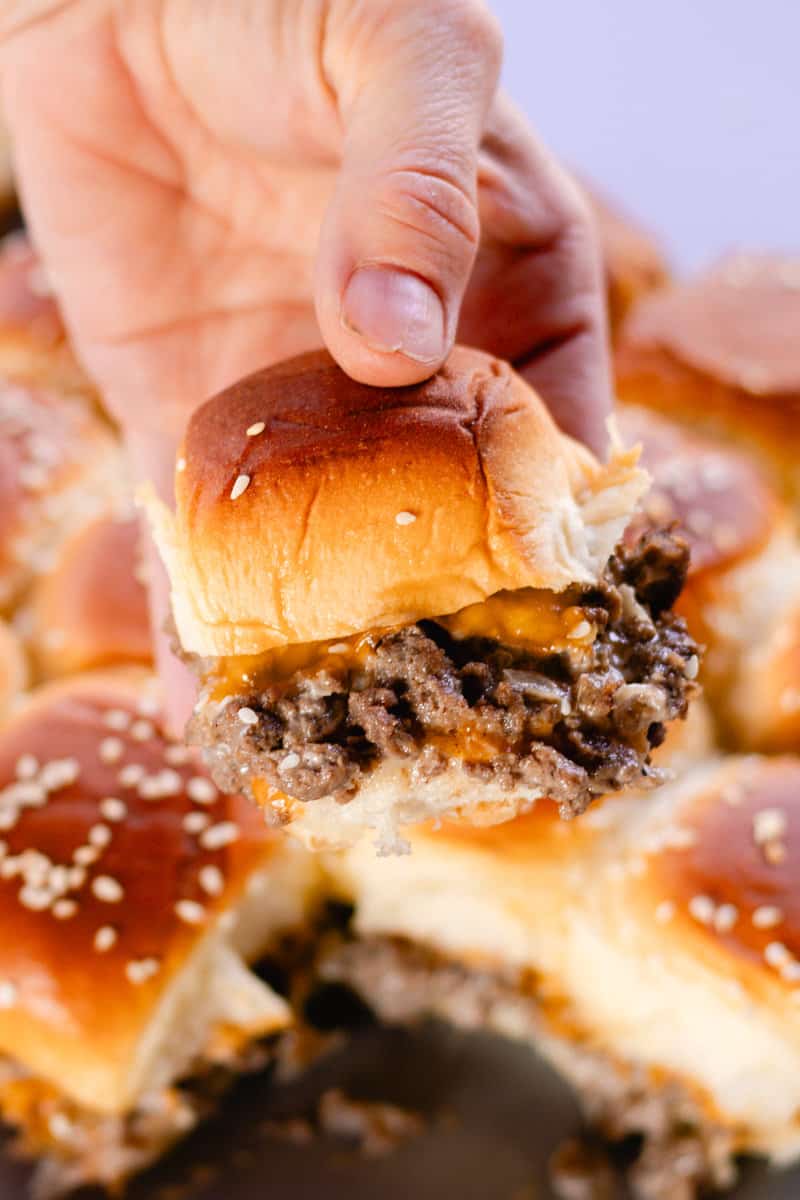
We love having them plain with butter, serving them with BBQ, or using them for homemade sliders!
They’re also so good alongside my Hawaiian chicken kabobs for a tropical summer dinner.

The weather is warming up, and that has me dreaming of summer days spent barbecuing and picnicking!
For both of those things, we are going to need a great Hawaiian roll recipe to make our meals spectacular.
Hawaiian rolls are such a versatile bread to keep on hand. They are delicious with BBQ meats like pulled pork or Dutch oven brisket, and they make sliders (like these venison sliders) and cold deli sandwiches that my kids absolutely devour.
These particular rolls are my go-to recipe because they are made with freshly milled flour! Fresh flour gives them the rich, nutty flavor of whole grains while still offering a fluffy, light roll.
With fresh milled flour, wholesome ingredients, and the vibrant flavor of pineapple juice, you’ll never go back to packaged Hawaiian rolls!
And if you need some more fresh milled bread options in your life, try my fresh milled flour sandwich bread, cornbread with freshly milled flour, and my flaky, freshly milled biscuits.
Table of Contents
Why You’ll Love This Recipe
Fluffy and soft: The best rolls, in my opinion, are pillowy soft and airy while still having enough structure to hold meat for sliders. I kept this in mind as I developed my freshly milled dinner rolls recipe, and these Hawaiian rolls have that same beautiful texture.
Simple ingredients: Homemade Hawaiian rolls have a short and simple ingredients list compared to store-bought alternatives. I like to keep my bread products simple and wholesome whenever I can.
Useful kitchen staple: Keeping different bread products in stock makes meals a breeze, and they are so versatile! These Hawaiian rolls are great for meal prep at the beginning of the week to serve as a simple side, top with chili scrambled eggs for breakfast, or make into quick and easy sandwiches.
Key Ingredients

- Pineapple juice: Pineapple juice adds a sweet, tropical flavor to these Hawaiian rolls! You can use bottled, canned, frozen, or fresh. Make sure it’s warmed to 100–105°F to properly bloom the yeast.
- Sugar: You’ll notice this recipe has more sugar than most bread product recipes, and that’s because Hawaiian rolls are supposed to be on the sweeter side. If you want something similar without the refined sugar, try my fresh milled flour buns.
- Butter: Some for mixing into the dough and some for brushing onto the rolls after baking, which gives them that shiny, buttery, soft exterior that is typical of rolls.
- Hard white wheat flour: I found that hard white wheat berries gave the fluffiest, smoothest dough. You can substitute hard red wheat, but they will be more grainy and less like traditional Hawaiian rolls.
Find the full ingredients list with measurements in the recipe card below.
How to Make Fresh Milled Flour Hawaiian Rolls

Step 1. Activate the yeast
Pour the warm pineapple juice and milk into a large mixing bowl.
Stir in the yeast along with 2 tbsp of sugar.
Add 1 cup of the flour and whisk into a thick slurry.
Let sit 5–10 minutes until bubbly and expanded.

Step 2. Build the dough
Add the remaining sugar, eggs, and salt. Mix well.
Add 4 more cups of freshly milled flour. Begin mixing until a shaggy dough forms.
Knead for about 4–5 minutes before adding the butter.

Step 3. Add the butter
Slowly mix in the melted butter a little at a time. After everything is mixed, wet your hands and begin kneading the dough in the bowl. Knead for about 10 minutes. The dough should become smoother and start pulling away from the sides of the bowl, though it may still stick slightly when you lift it.
The dough will feel sticky. That’s normal and helps keep the rolls soft. Try not to add extra flour if possible. If it becomes too difficult to handle, you can add a small amount of flour a little at a time, but keep in mind that adding too much flour will make the rolls more dense.
See notes below for doing the stretch and fold method.

Step 4. First rise
Cover the dough with a tea towel.
Let rise until doubled in size. This can take anywhere from 1 1/2 to 3 hours, depending on your home’s temperature. (see notes on rising tips)

Step 5. Shape + Second rise
Punch down the dough and divide it into around 24 small rolls.
Shape into tight balls and place into greased baking pans. Keep in mind they are going to about double in size, so shape them accordingly!
Cover and let the rolls rise again until puffy, about 1 ½ times their size (about 40 minutes). They should look airy and pillowy.

Step 6. Bake, Cool, and Serve
Preheat oven to 350°F.
Bake 18–22 minutes, until golden, and the internal temperature reaches 190–195°F.
Brush the warm rolls with melted butter.
Let cool at least 10–15 minutes before serving.

Serving Suggestions
I use these exactly like you would with any other Hawaiian rolls. When I made these the other day, I used them for my buffalo chicken sloppy joes! Oh, they were so good!
Tips + Notes
- If your house is on the cooler side, you can place the dough in the oven with the oven light on. Just make sure you do not turn on the oven!
- Stretch and fold: Instead of kneading, you can develop the dough by stretching and folding it during the first rise.
- After mixing the dough, cover the bowl and let it rest for 30 minutes. Wet your hands, then grab one side of the dough, gently stretch it upward, and fold it back over the center. Turn the bowl a quarter turn and repeat. Continue until you’ve gone all the way around the dough (about 4 folds total).
- Cover the bowl again and let it rest another 30 minutes. Repeat this process every 30 minutes for about 2–3 hours, or until the dough becomes smoother, elastic, and holds its shape better.
- You can make this with hard red wheat, too, but it will be a bit more grainy. Still good, but they don’t have that same “Hawaiian roll” taste.
- I always recommend investing in a good grain mill. I tried a few before I settled on my Mockmill professional grain mill, and the quality of the mill made a huge difference in the texture of my baked goods.

Recipe FAQs
As I said, there are so many! You can serve them plain with butter, honey, or jam, or top them with scrambled eggs for breakfast. They make delicious sliders with hamburger meat, pulled chicken, or sloppy joe filling. You can also use Hawaiian rolls as the base of sandwiches with deli meat, cheese, and mustard!
Yes! Hawaiian rolls freeze very well. Once they are completely cool, wrap the rolls in plastic wrap and stick them in a freezer bag. They can be stored in the freezer for up to 6 months, then thawed at room temperature when you’re ready to serve.
This could be a problem with the yeast or simply a temperature issue. Check that your yeast is fresh and not expired, and ensure that your pineapple juice and milk mixture is about 100–105°F. Liquid that is too hot will kill the yeast, and too cold may prevent it from blooming properly. If all of that is correct, it may just be that your house is too cool. If that’s the case, I recommend putting the rolls in the oven (make sure it doesn’t get turned on), with the oven light on to create a warm environment.
You can, but your rolls will have an exterior crust more similar to sandwich bread, rather than the soft and buttery crust that rolls typically have. If you don’t want to do butter, I recommend at least brushing the rolls with milk before you bake them.

If you’re new to the fresh milled flour world, you are going to love the fresh, nutty flavor that only comes from recently milled grains! On my blog, you can learn all about how to mill your own flour and how to bake with whole grains.
Find your next recipe in my list of best freshly milled flour recipes, or check out some of my most popular recipes below.
Related Recipes
- Brioche Bread With Freshly Milled Flour
- Baguettes with Freshly Milled Flour
- Fresh Milled Pizza Dough
- Hot Dog Buns With Fresh Milled Flour
- Seeded Bread With Fresh Milled Flour
If you tried this Fresh Milled Flour Hawaiian Rolls or any other recipe on my website, please leave a star rating and let me know how it went in the comments below. Thanks for visiting!

Freshly Milled Flour Hawaiian Rolls
Equipment
Ingredients
- 1½ cups pineapple juice warmed to about 100–105°F
- 4½ teaspoons active dry yeast 2 packets
- ¾ cup cane sugar divided (166g)
- 2 large eggs room temperature
- 1 teaspoon salt
- ½ cup butter melted and cooled (1 stick)
- ¼ cup whole milk (2oz)
- 5 cups freshly milled hard white wheat flour (650 g (130g per cup))
For the wash
- 2 tbsp melted butter
Instructions
- Activate the yeastPour the warm pineapple juice and milk into a large mixing bowl. Stir in the yeast along with 2 tbsp of sugar.Add 1 cup of the flour and whisk into a thick slurry. Let sit 5–10 minutes until bubbly and expanded.
- Build the doughAdd the remaining sugar, eggs, and salt. Mix well.Add 4 more cups of freshly milled flour. Begin mixing until a shaggy dough forms.Knead for about 4–5 minutes before adding the butter.
- Add the butterSlowly mix in the melted butter a little at a time. After everything is mixed, wet your hands and begin kneading the dough in the bowl. Knead for about 10 minutes. The dough should become smoother and start pulling away from the sides of the bowl, though it may still stick slightly when you lift it.The dough will feel sticky. That’s normal and helps keep the rolls soft. Try not to add extra flour if possible. If it becomes too difficult to handle, you can add a small amount of flour a little at a time, but keep in mind that adding too much flour will make the rolls more dense.*See notes below for doing the stretch and fold method.
- First riseCover the dough with a tea towel.Let rise until doubled in size. This can take anywhere from 1 ½ to 3 hours, depending on your home's temperature. (See notes on rising tips.)
- ShapePunch down the dough and divide it into around 24 small rolls.Shape into tight balls and place into greased baking pans. Keep in mind they are going to about double in size, so shape them accordingly.
- Second riseCover and let the rolls rise again until puffy, about 1 ½ times their size (about 40 minutes). They should look airy and pillowy.
- BakePreheat oven to 350°F.Bake 18–22 minutes, until golden and the internal temperature reaches 190–195°F.
- Cool and serveBrush the warm rolls with melted butter. Let cool at least 10–15 minutes before serving.
Video
Notes
- *Stretch and fold: Instead of kneading, you can develop the dough by stretching and folding it during the first rise.
- After mixing the dough, cover the bowl and let it rest for 30 minutes. Wet your hands, then grab one side of the dough, gently stretch it upward, and fold it back over the center. Turn the bowl a quarter turn and repeat. Continue until you’ve gone all the way around the dough (about 4 folds total).
- Cover the bowl again and let it rest another 30 minutes. Repeat this process every 30 minutes for about 2–3 hours, or until the dough becomes smoother, elastic, and holds its shape better.
- If your house is on the cooler side, you can place the dough in the oven with the oven light on. Just make sure you do not turn on the oven!
- You can make this with hard red wheat, too, but it will be a bit more grainy. Still good, but they don’t have that same “Hawaiian roll” taste.
- I always recommend investing in a good grain mill. I tried a few before I settled on my Mockmill professional grain mill, and the quality of the mill made a huge difference in the texture of my baked goods.


If I don’t have a mill just yet, could I use all purpose flour?
Yes, you can sub for all purpose flour. Just measure by weight!
I love making ham sliders and decided to use this recipe with fresh milled flour! Everyone loved them!
Yay, I am so happy to hear! These definitely make the best sliders!
This turned out great with your pulled pork sliders!
What a great idea!
I love this recipe! Can’t wait to try it today!
I am so happy to hear! I can’t wait for you to try it!