
This post contains affiliate links. Please read our disclosure policy.
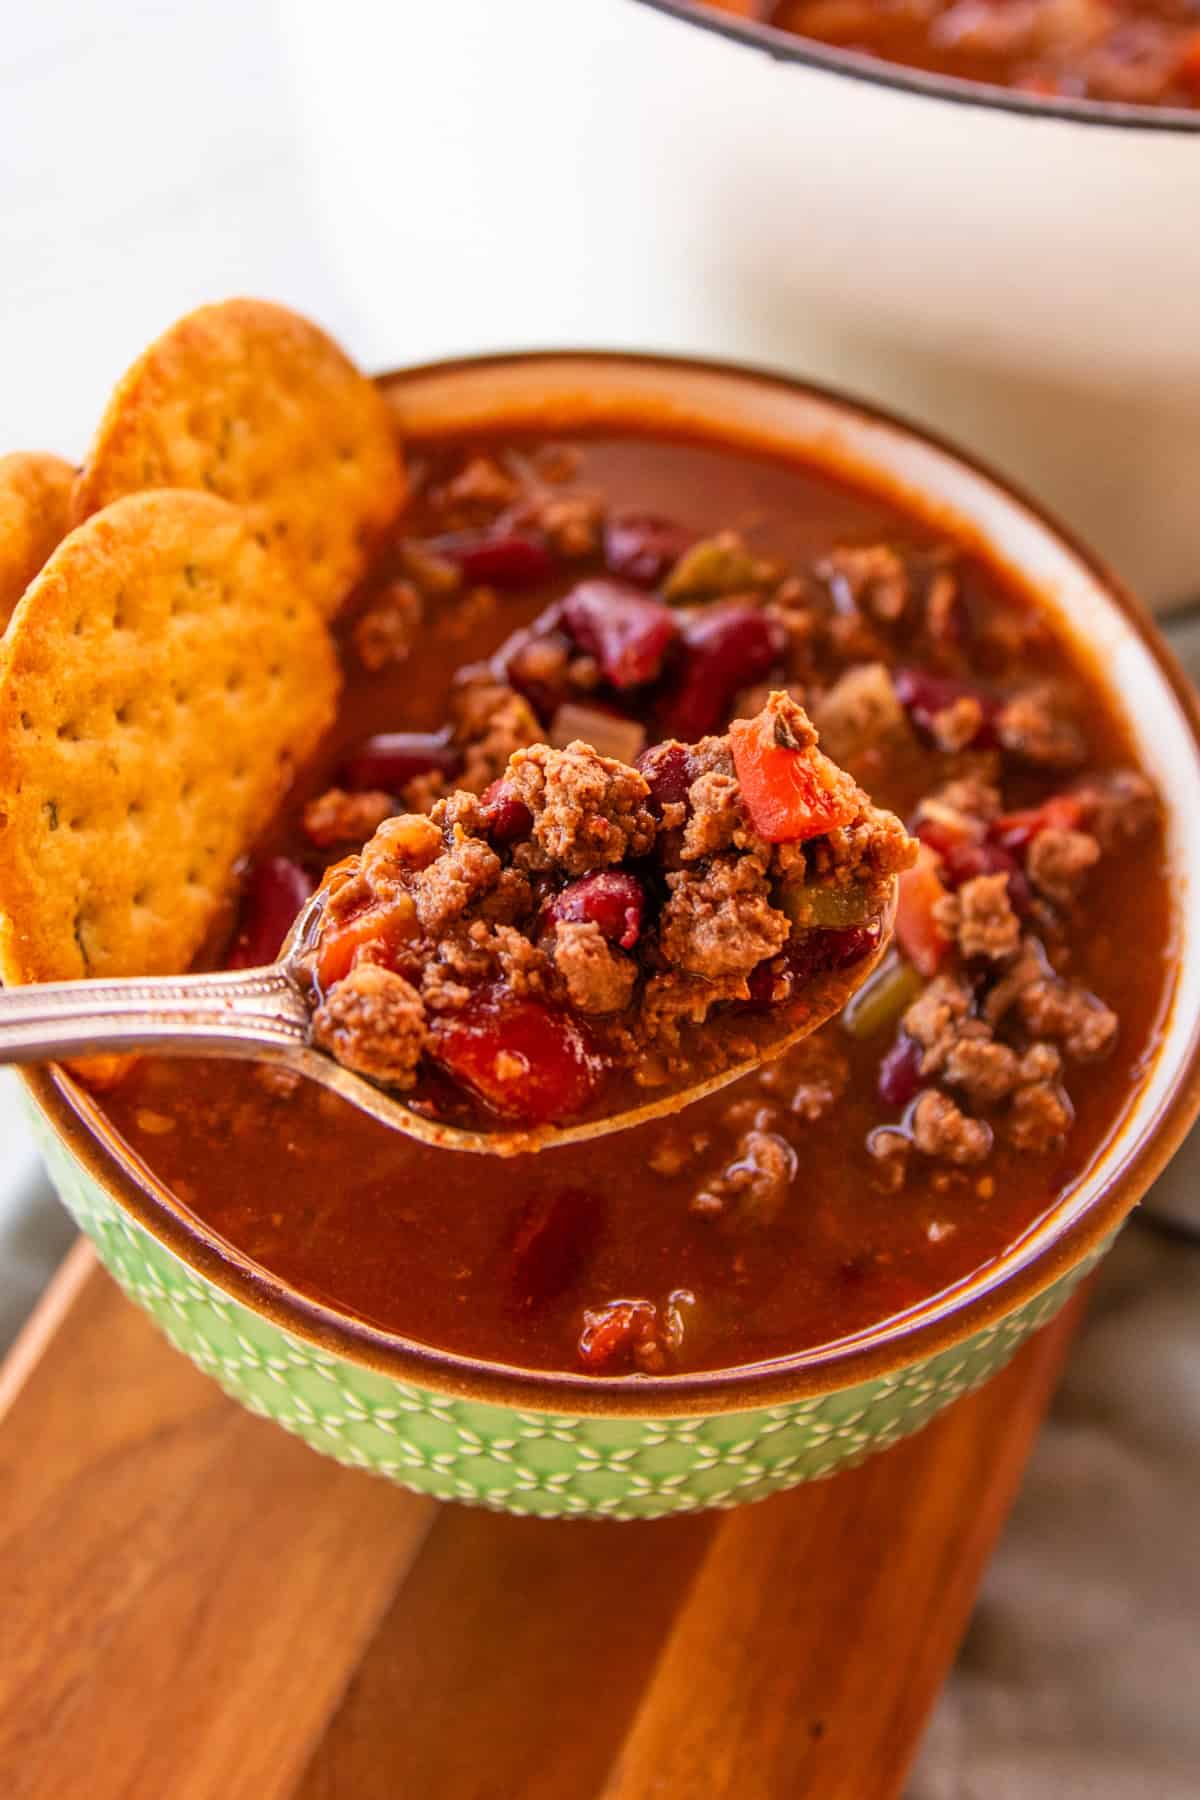
This easy, hearty venison chili is packed with bold flavors and perfect for a cozy night in. This chili can be ready in under an hour, or let it simmer for several hours to give the flavors time to meld; either way, this chili is one recipe for the books.

Believe it or not, fall is here, which for me means comfort foods like my hearty moose stew and venison stew recipe.
While I make a lot of different chili recipes, I began making this one soon after I met my husband, and I must say, it remains a favorite staple every winter.
I’ll change it up a little from time to time, but I always go back to the original recipe eventually. It’s really just a perfect, flavorful chili made with ground venison.
Of course, you can use ground beef as well, or if you have ground moose, be sure to check out my ground moose chili recipe. Fair warning: it’s spicy!
Serve this with some freshly milled cornbread, and you are in for a treat!
Table of Contents
Why you will love this recipe
- Stovetop Convenience: This chili is made completely on the stovetop, so you have room for your cast iron cornbread in the oven!
- Perfect for Winter: A hearty, soul-warming dish that’s ideal for chilly evenings.
- One Dish: Cleanup has never been easier with a meal like this!
Recipe Ingredients

- Ground Venison: You can use ground venison like I do or a combination of ground venison and ground pork fat.
- Onion: I like yellow onions best for this chili, but I have had readers say they use white onions and even shallots.
- Garlic: Minced fresh garlic is best.
- Salt and pepper
- Green pepper: Deseeded and diced.
- Diced tomatoes: I use canned diced tomatoes, drained.
- Diced green chiles: You can use any heat level you prefer; I get medium heat from the Old El Paso brand.
- Kidney beans: I pour in the beans and juices together.
- Beef Broth: You can use beef or chicken broth. I actually make my own oxtail bone broth, which is delicious!
- Chili powder
- Cocoa powder
- Cumin
- Smoked paprika
- Cayenne pepper
How to Make Venison Chili
This one comes together in a single pot right on the stovetop, which is really why I have kept making it all these years; there is no browning in one pan and moving it to another, and no babysitting it either.

Step 1: Brown venison with onion, green pepper, jalapeno, and garlic. Stir in salt and pepper.

Step 2: Stir in tomatoes, beans, green chiles, broth, and all the seasonings.

Step 3: Cover and simmer for at least 30 minutes, though if you have time, I recommend simmering for at least 2 hours.
Expert Tips
- Simmer it as long as you can: The more time you can give the flavors to meld, the better it will all taste, and while thirty minutes will absolutely get dinner on the table, two hours is when it really turns into something and overnight? My oh my, it just keeps getting better!
- Let the venison sit and brown: Venison is so lean that there is not much fat in the pan doing the work for you, so I let it sit undisturbed for a few minutes and get some real color on it before I start stirring things around.
- Taste it before it goes in the bowls: Chili powder varies so much from brand to brand, and I almost always end up going back in for a little more salt at the end.
- Serve with saltines, Fritos, or my freshly milled crackers!
Variations
- Use whatever beans you have: Kidney beans I always have on hand, but pinto or black beans work in the very same amount, and honestly nobody at the table is going to know the difference. Well, they might, but its still going to be delish!
- Turn up the heat: If you want this hotter, a chopped chipotle in adobo stirred in with the rest of the seasonings will do it, as well as add some delicious flavor. Fair warning: start with one and taste before you add another.
- Keep it mild: Leave the cayenne out and reach for mild green chiles instead of medium, and you still get all of that deep, smoky flavor without anybody reaching for the milk.
- Change up the meat: Of course, you can substitute pound for pound with elk, moose, beef, or ground pork, and if you happen to have ground moose in the freezer, go make my ground moose chili instead!
What to Serve With Venison Chili
Cornbread, always. I get my cast iron cornbread into the oven while the chili simmers away on the stovetop, and that right there is the whole dinner.
Buttered dutch oven bread, loaded baked potatoes, and a pot of noodles for chili mac are all wonderful with it too, so you really cannot go wrong.
Set out toppings and let everybody build their own bowl: sour cream, shredded cheddar, sliced jalapenos, diced onion, and a few wedges of lime. I love this part, and I mean, half the fun of chili night is the toppings.
How to Store Leftovers
Store your leftovers in an airtight container in the fridge for up to 5 days. Do note: those hot peppers keep permeating the whole pot the entire time it sits, so by day three it can taste a good bit hotter than it did the night you made it.
Chili also freezes beautifully, so I let it cool all the way down, portion it into freezer containers, and it will keep for about 3 months.
To reheat: warm it low and slow on the stovetop with a splash of broth if it has thickened up on you, and I must say, my husband always says its better the next day!
Ground venison recipes
Do you struggle to know what to make with all the venison in your freezer? For me, the ground venison recipes, like my venison casserole, are the easy part; I mean, you can just about make anything with ground venison as you can with ground beef.
Along with this chili, popular ground venison favorites include venison meatloaf, venison burgers, and venison stroganoff.
Recipe FAQs:
Absolutely not. I like my chili with plenty of liquid, so I don’t drain the beans, AND I add the broth. This recipe will be just fine without broth. Just make sure there is some liquid in the chili so it doesn’t dry out.
Of course, substitute the venison pound for pound with elk, moose, beef, or ground pork. I have a fantastic ground pork chili recipe that you will have to try!
Unlike venison steak or other similar venison recipes, the chili definitely has a rich, distinct flavor. However, with the combination of spices and other ingredients, it has very little gamey taste.
Buttered dutch oven bread, cast iron cornbread, loaded baked potatoes, noodles (chili mac), etc., complement chili quite well.
Chili stored in the freezer should keep for 3-5 days. Do note: the hot peppers will continue to permeate throughout the dish in the fridge and, as a result, may taste hotter than it originally did.
I make mine on the stovetop, so that is the version I can vouch for. If you want to try it in the slow cooker, brown the venison with the onion, pepper, jalapeno and garlic first so you do not lose all that flavor, then move everything over and let it go on low. Do note: I have not timed it out myself, so keep an eye on it that first time.
Take the lid off and let it keep simmering. Nine times out of ten a thin chili has just been covered the whole way through, and twenty minutes uncovered will sort it right out. If you are in a hurry, mash some of the beans against the side of the pot and stir them back in.

Related Recipes
If you tried this Venison Chili Recipe or any other recipe on my website, please leave a star rating and let me know how it went in the comments below. Thanks for visiting!

Venison Chili Recipe
Equipment
Ingredients
- 2 lbs ground venison
- 1 bell pepper seeded and diced
- 1 yellow onion diced
- 1 jalapeno seeded and diced
- 4 cloves garlic minced
- 1 tsp sea salt
- 1 tsp ground black pepper
- 2 cans of diced tomatoes 14.5 oz cans, drained
- 2 cans of kidney beans 15.5 oz cans with the juices
- 1 can chopped green chiles 4 oz can
- 1 cup beef broth
- 2 tbsp Worcestershire sauce
- 2 tbsp chili powder
- ½ tbsp cocoa powder
- ½ tsp cumin
- ½ tsp smoked paprika
- ⅛ tsp cayenne pepper
Instructions
- Brown venison with onion, green pepper, jalapeno, and garlic. Stir in salt and pepper.
- Once the meat is browned, stir in tomatoes, beans, green chiles, broth and Worcestershire sauce.
- Stir in seasonings, then cover and simmer for half an hour. (see notes below)
- Remove from heat and let it sit 15 minutes before serving.
Video
Notes
- The longer you simmer this chili, the more flavorful it becomes. For the best results, let it simmer for 2 hours or more, allowing the flavors to meld and deepen.
- This chili does have some heat to it. If you are not a fan of heat, simply omit the green chiles and jalapeno.
- I do have a video here in the recipe card. I have since changed up that version slightly, but for the most part, its the same.











Seriously the best flavor of any chili I’ve ever made.
Thank you so much!
Turned out great!
Thank you so much! I am so happy you loved it!
Award winning recipe!