This post contains affiliate links. Please read our disclosure policy.
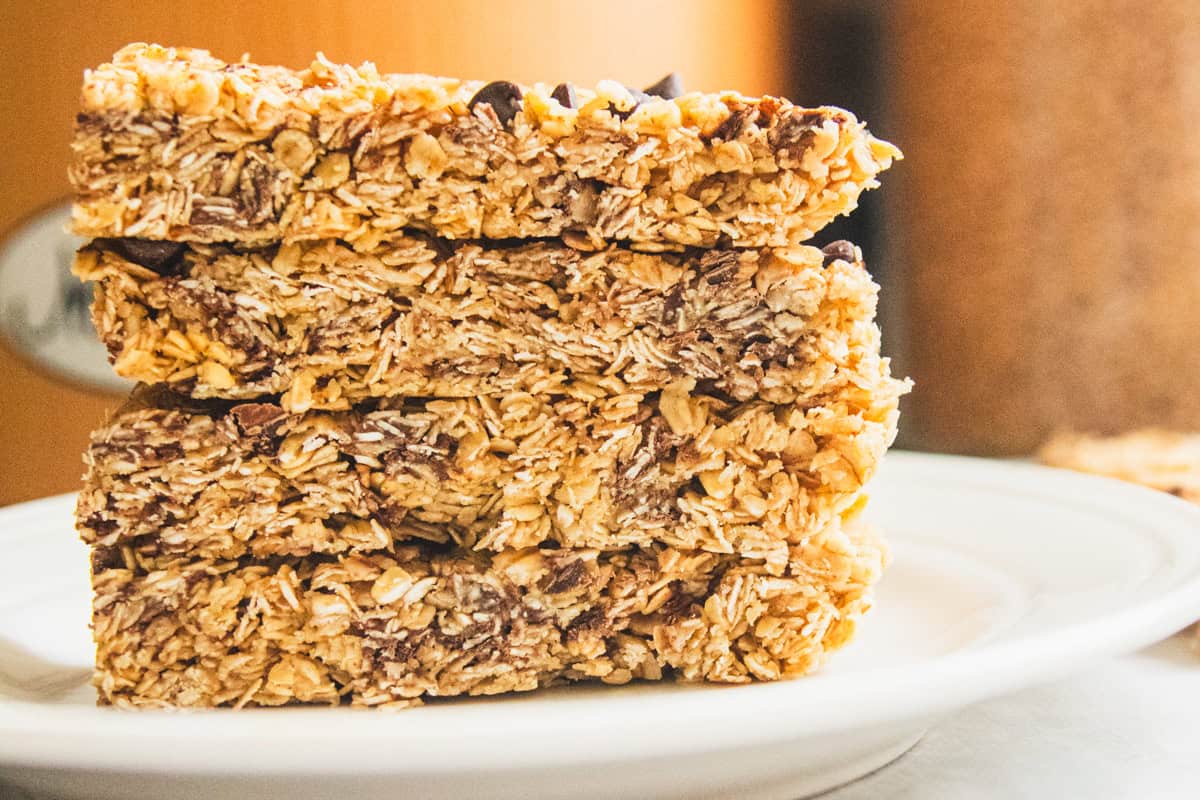
Chewy, sweet, and filling, these homemade granola bars are the perfect grab-and-go snack. They are easy to make, customizable, and utterly delicious!
With a lot of kids in the house, I am always in need of snacks. If you have kids, I’m sure you understand.
I don’t like spending a lot of money on store-bought snacks, and I’m rather selective about ingredients, so making homemade snacks is the way to go!
These homemade granola bars have become an absolute staple for us. Honestly, they even double as breakfast sometimes, if I can keep enough of them around, haha! They’re perfect to make ahead, just like my overnight oats recipe or even my pumpkin yogurt recipe!
They are quick to make, easy for the kids to grab, and taste so much better than any store-bought granola bar.
These simple peanut butter chocolate chip granola bars are perfect for back-to-school, summer adventures, or just quick afternoon snacks throughout the week!
Table of Contents
Why You’ll Love This Recipe
- Making your own snacks is a fantastic way to save money. Pre-made snacks from the grocery store add up quickly, but the ingredients to make your own are usually much more affordable.
- Homemade granola bars are completely customizable! You can swap out just about any of the ingredients to make a bar you’ll love and accommodate different dietary needs.
- These granola bars are so easy! Easy to make and easy to eat. I love keeping granola bars in the fridge so we have something that is ready to enjoy as soon as we get hungry.
Ingredients
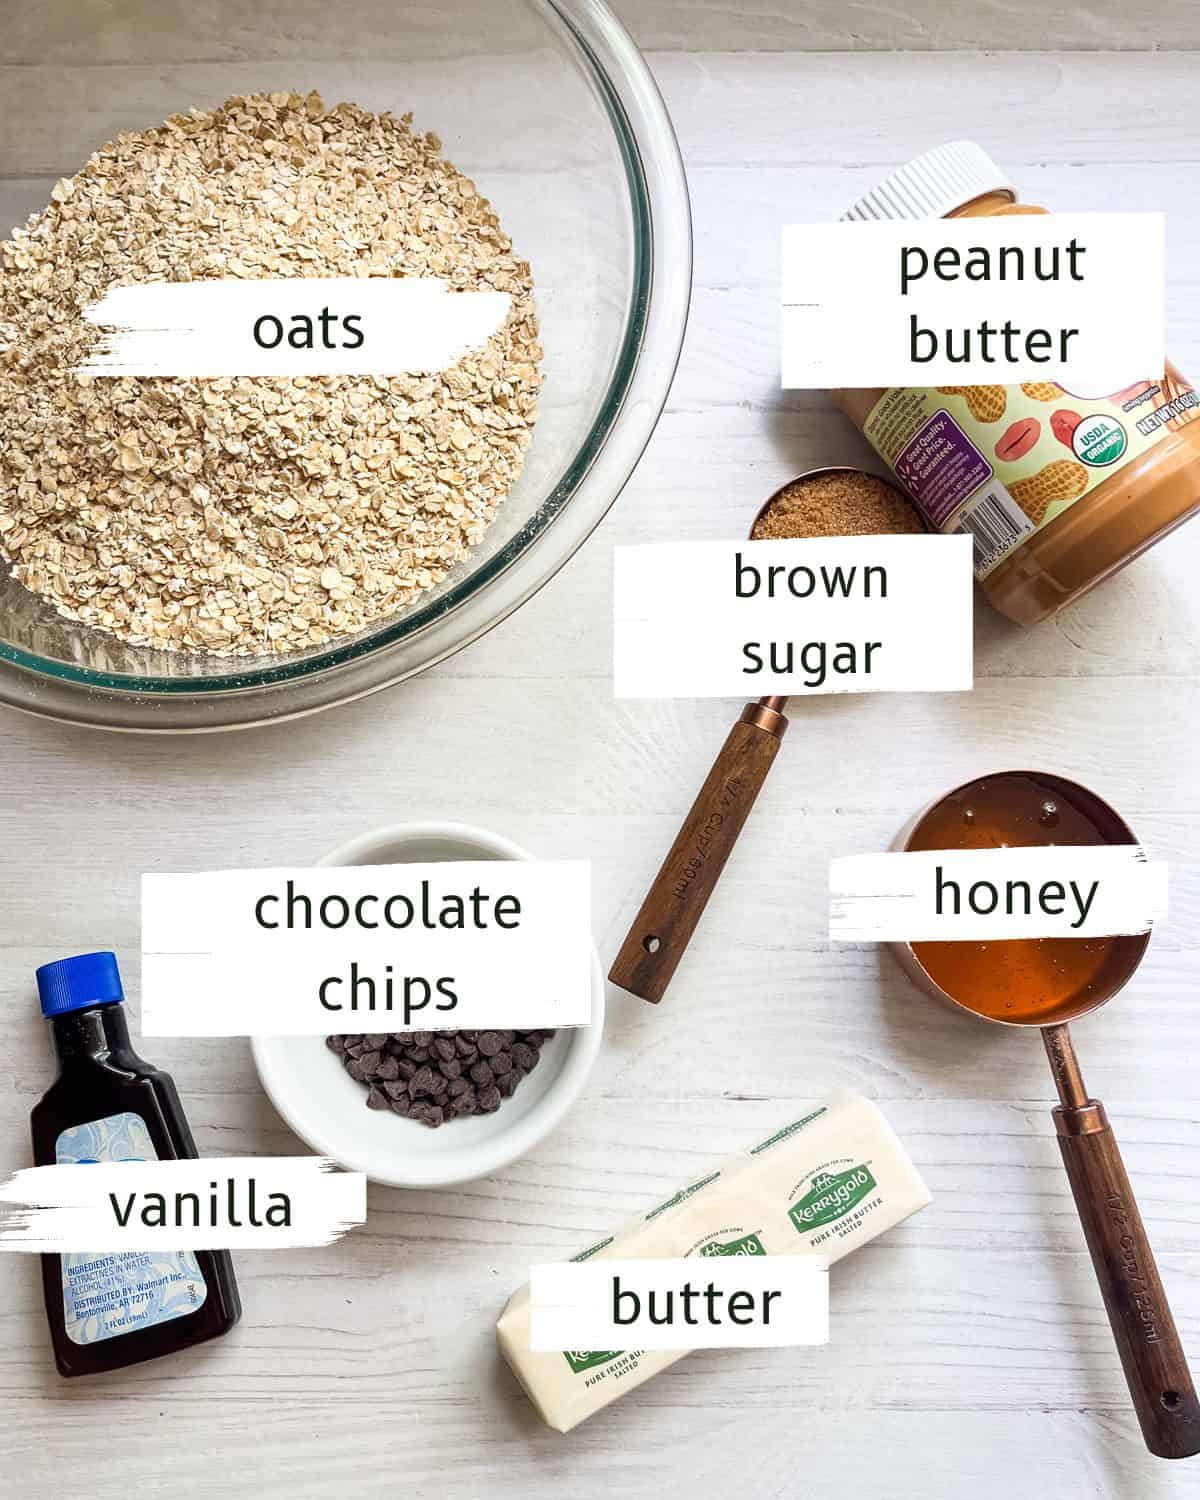
- Instant oats: I find instant oats to have a better texture than rolled oats in granola bars. They are more tender and easier to chew. You can substitute rolled oats if you prefer, but you’ll want to bake them first.
- Butter: High-quality salted butter is best.
- Peanut butter: Helps the bars stick together while adding protein, similar to my no-bake protein balls. I used natural peanut butter (the kind you have to stir). You can use whichever peanut butter you like, but the thicker the better, so your bars hold up well!
- Brown sugar: I like to use brown sugar in addition to the honey for a nicer texture and yummy caramelized flavor.
- Honey: Honey provides the stickiness that holds the bars together, and a delicious flavor, of course.
- Mini chocolate chips: My kids love mini chocolate chips in their granola bars! See the variations below for some alternatives.
- Vanilla extract: This completes the flavor — trust me!
Variations
- Swap out the chocolate chips for dried fruit, chopped nuts, or even a mix of seeds.
- Add a dash of cinnamon or nutmeg to the oat mixture for extra flavor.
- For a dairy-free version, use coconut oil or a plant-based butter substitute.
- Rather than peanut butter, use your favorite nut butter, such as almond butter or cashew butter.
How to Make Homemade Granola Bars
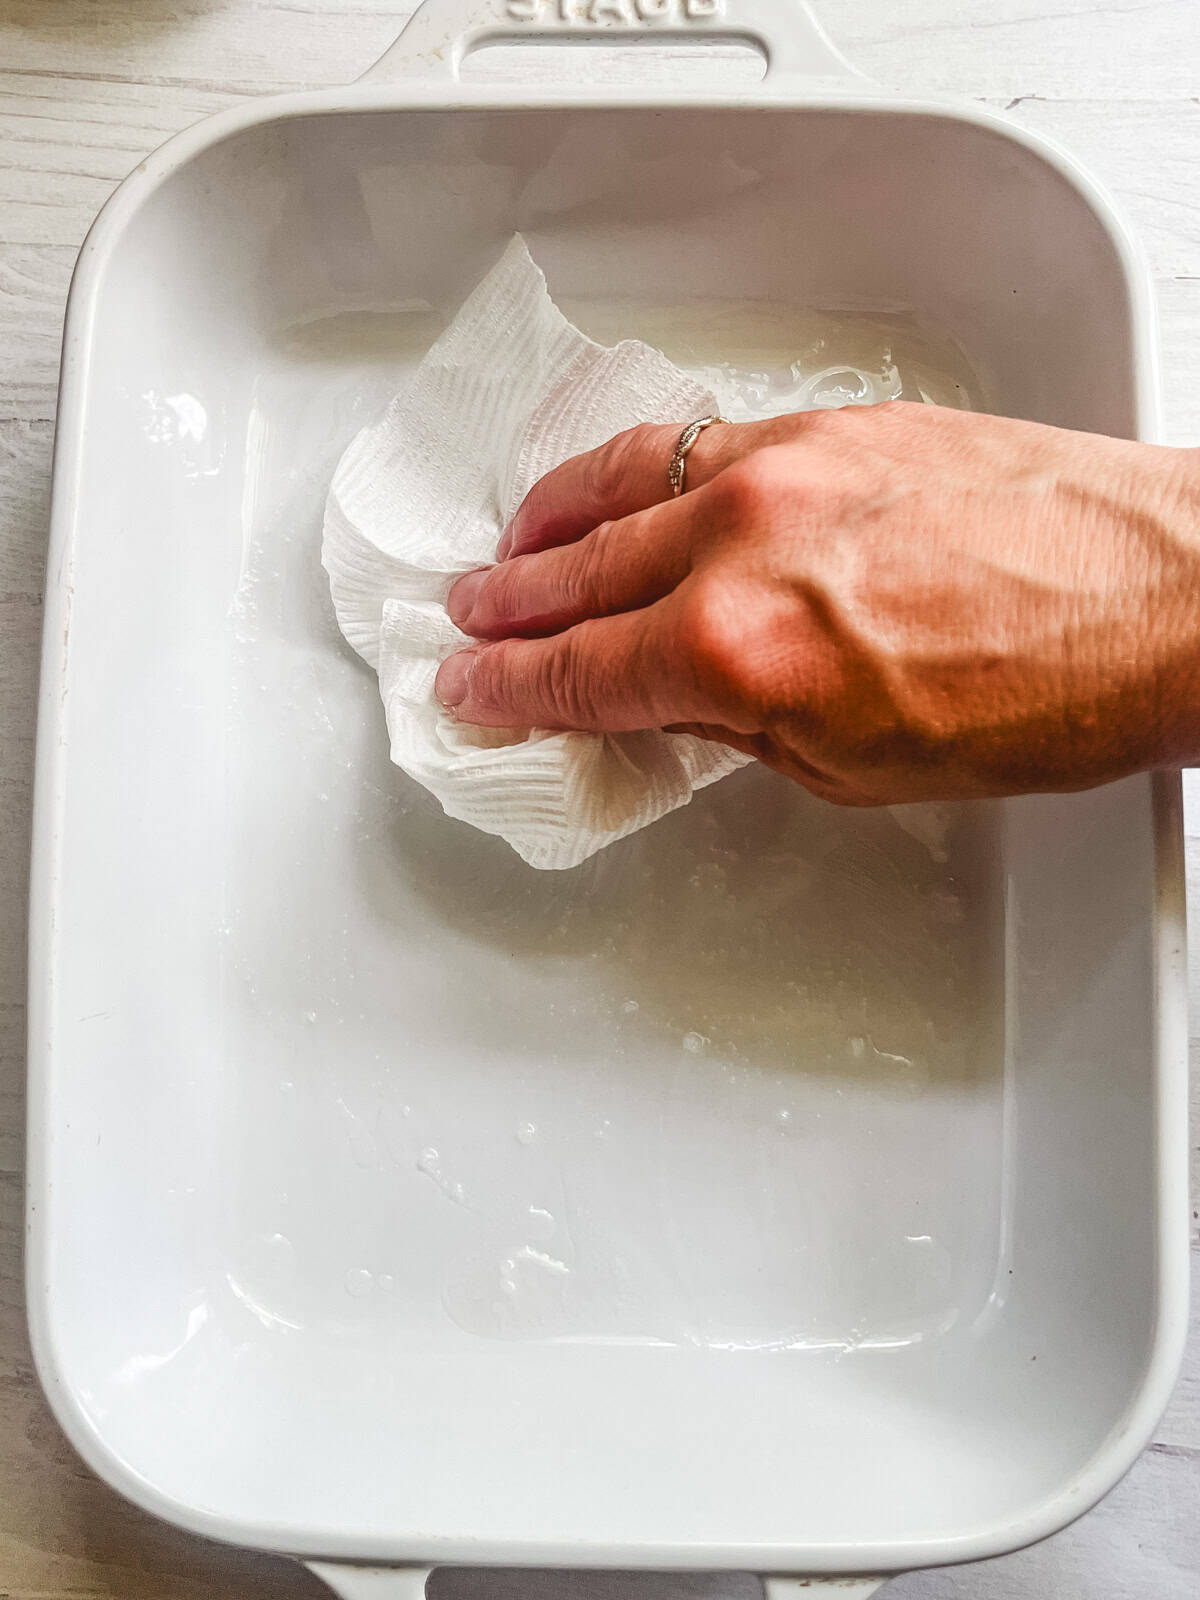
Step 1. Grease an 8×10 baking dish and set it aside. Add the oats to a large mixing bowl.

Step 2. In a small saucepan, combine the butter and brown sugar. Bring to a low simmer, stirring until the sugar has fully dissolved.
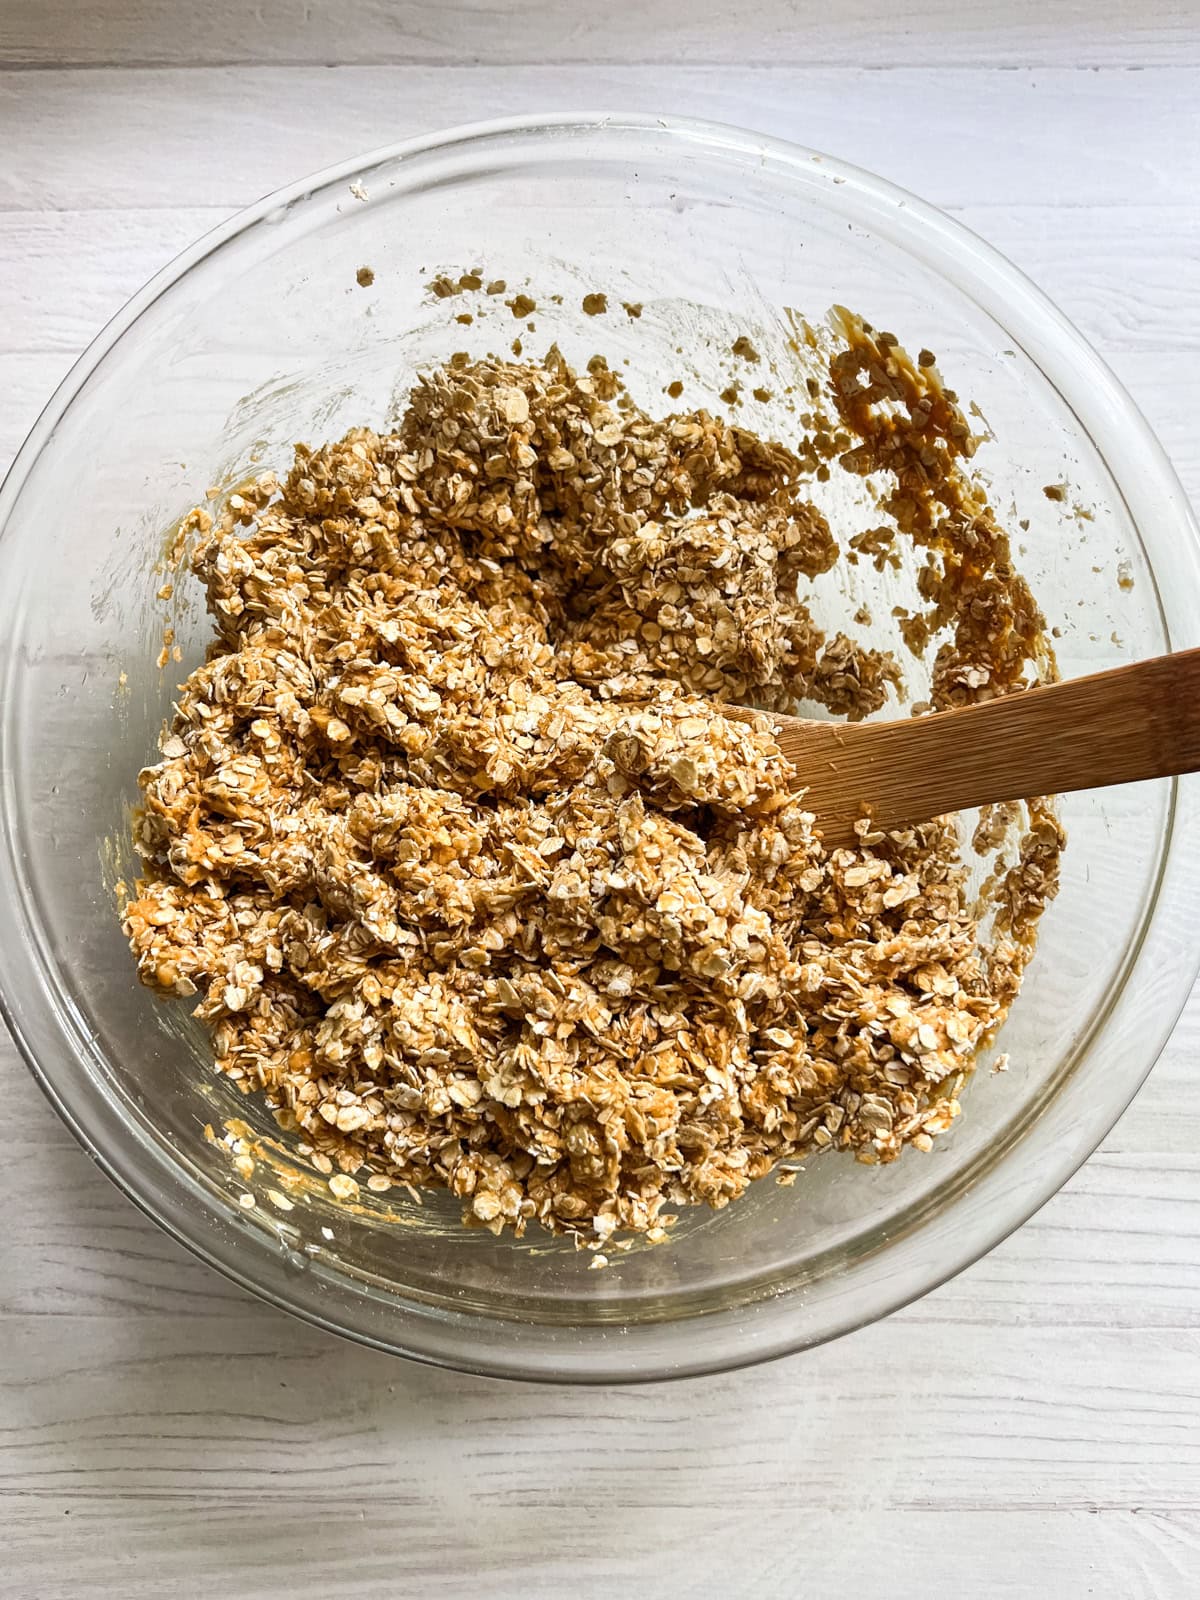
Step 3. While the butter is melting, add peanut butter and honey to the oats and mix well until all the oats are coated.
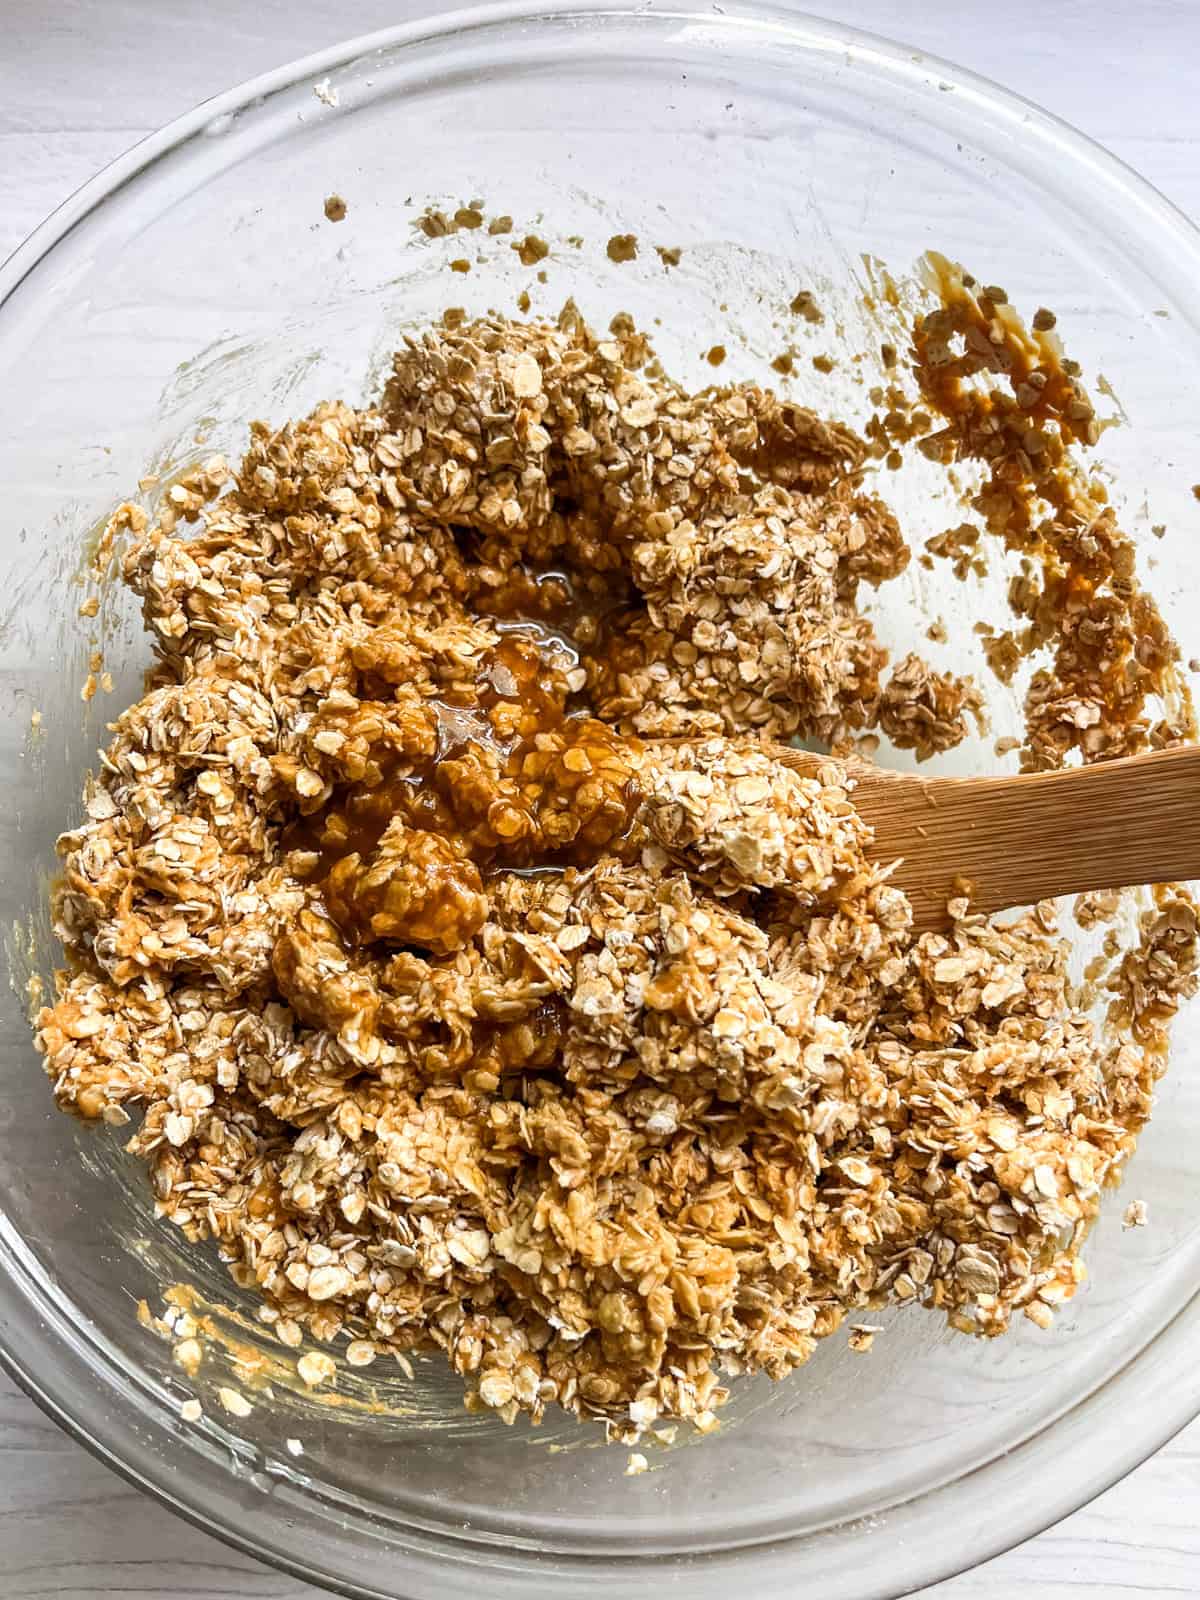
Step 4. Pour the melted butter and brown sugar in and mix again. Make sure there are no dry oats.
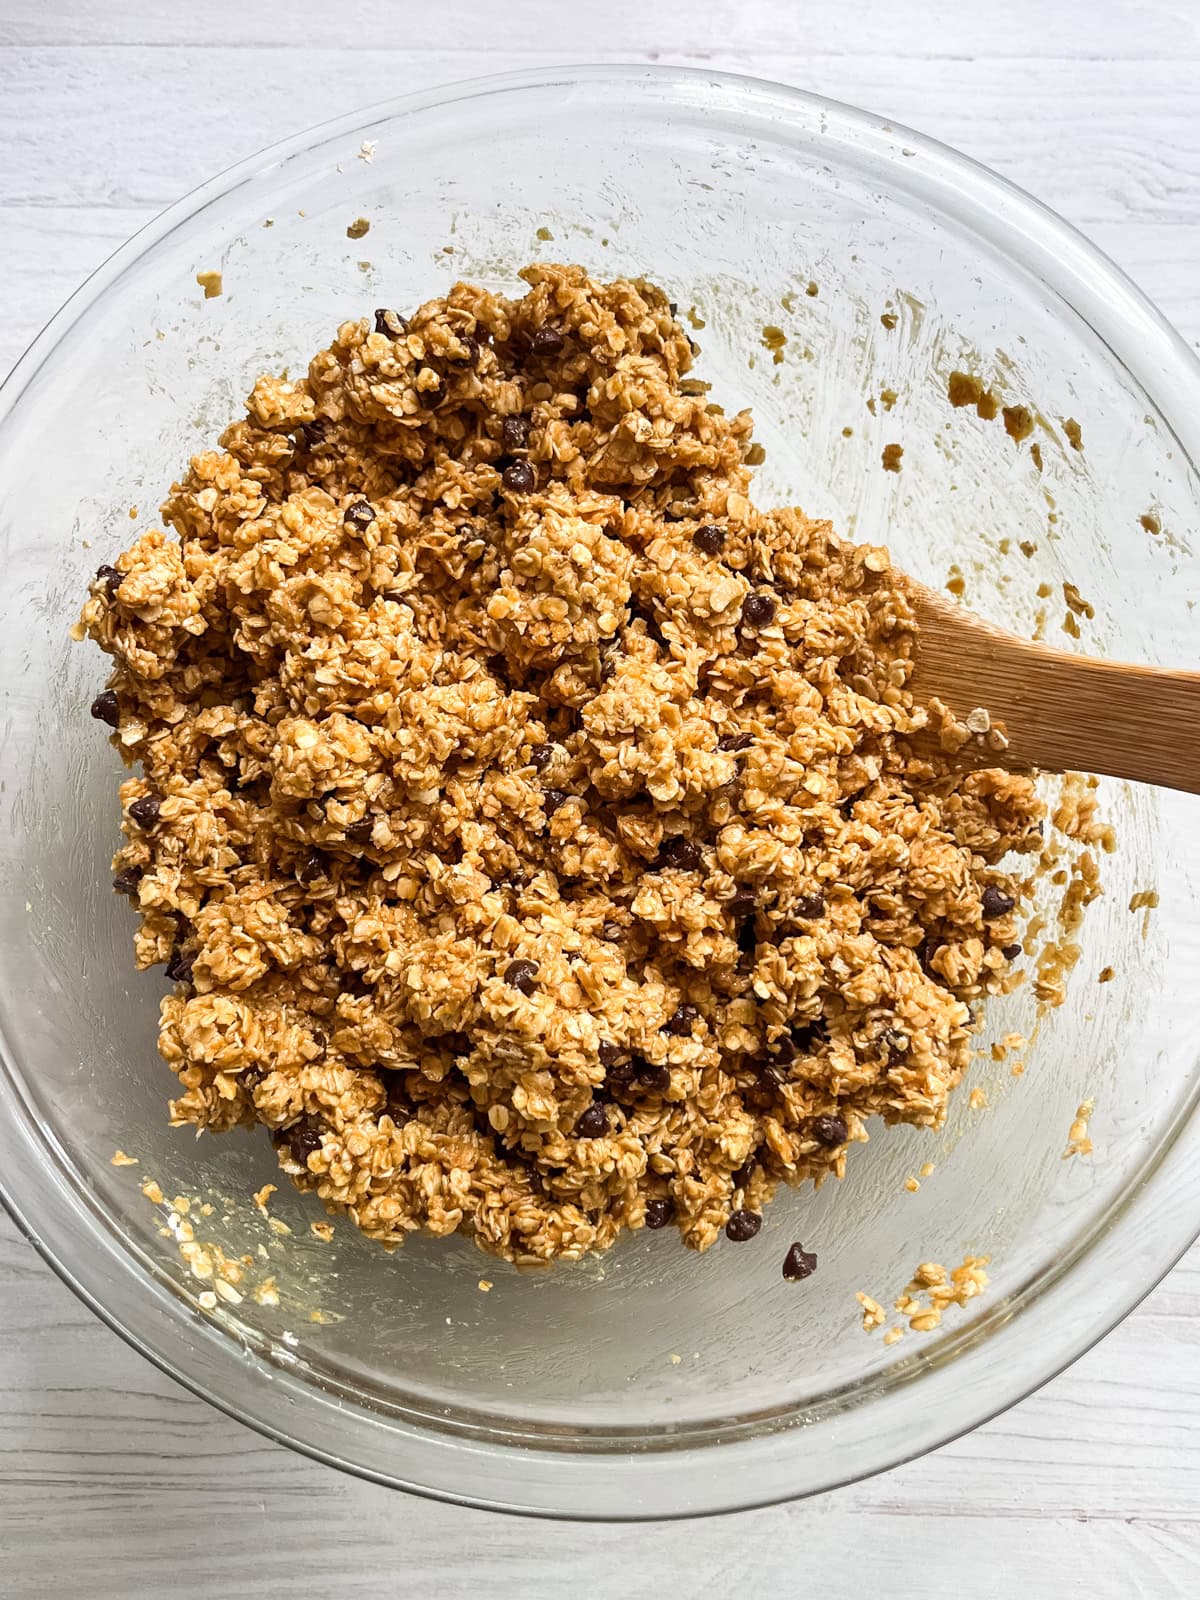
Step 5. Mix in the chocolate chips and vanilla extract until well combined.
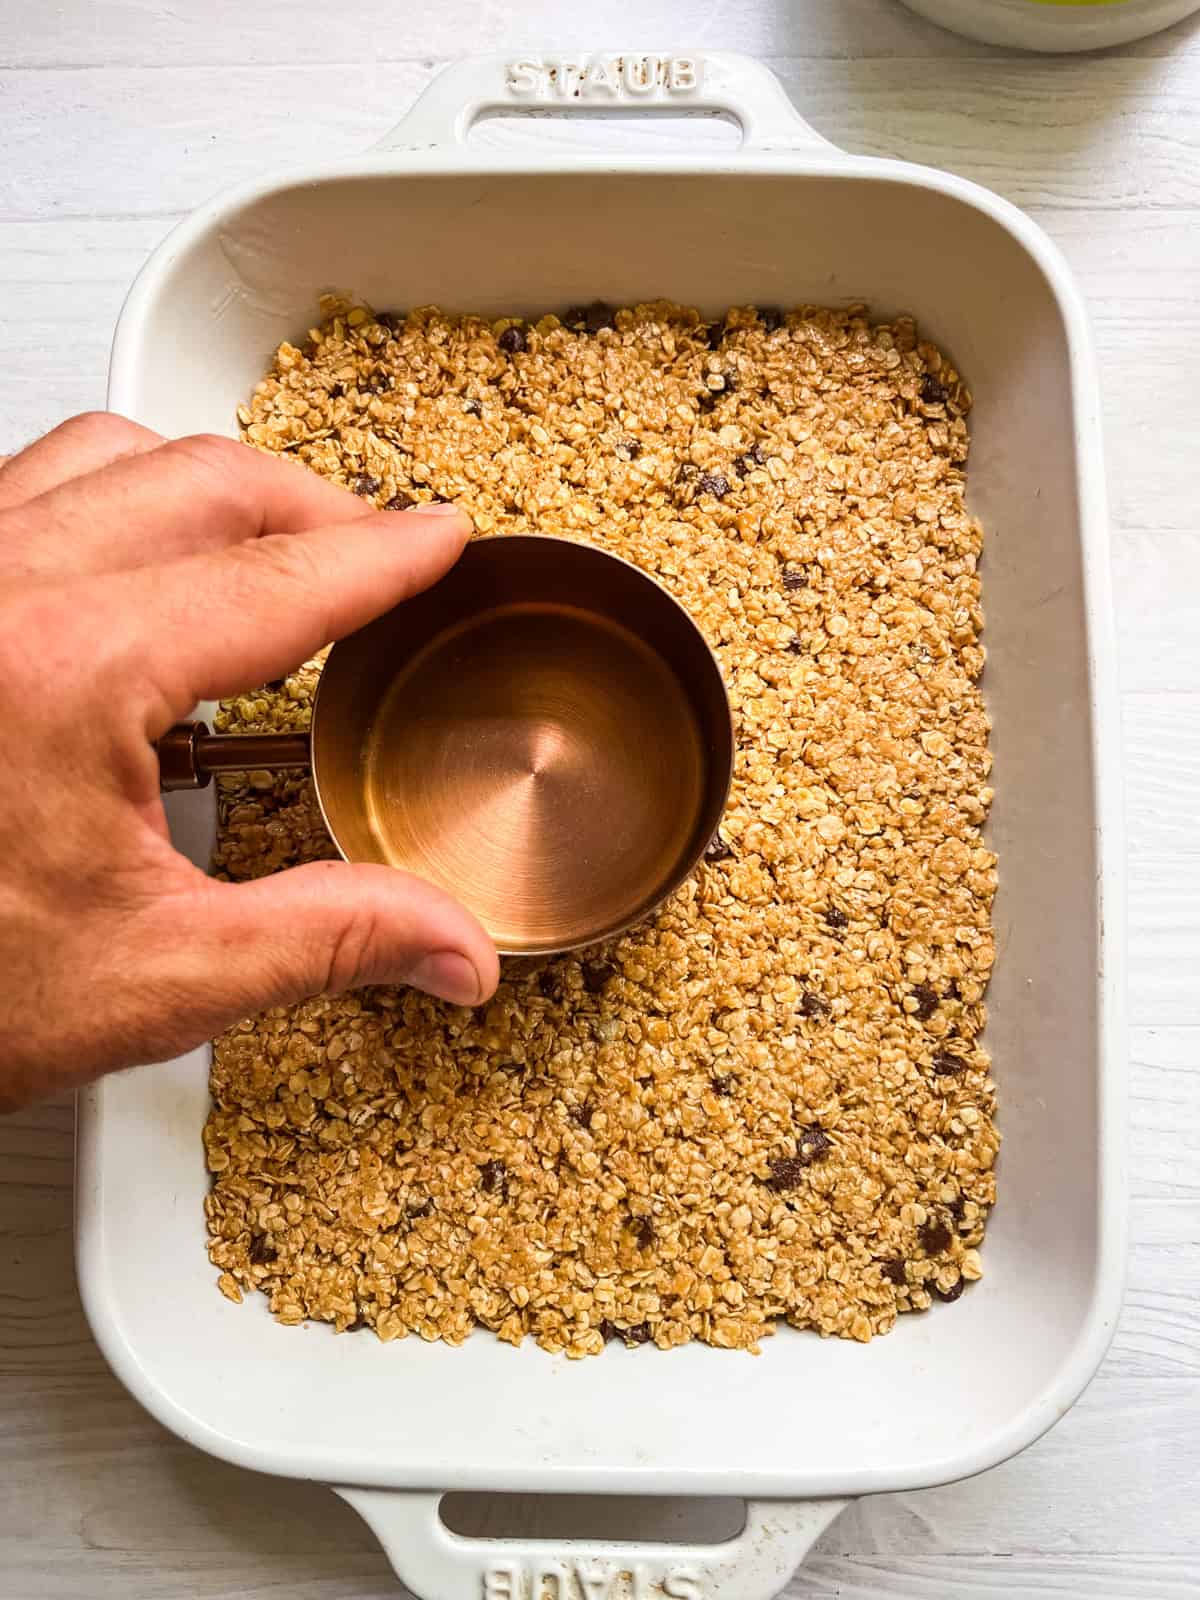
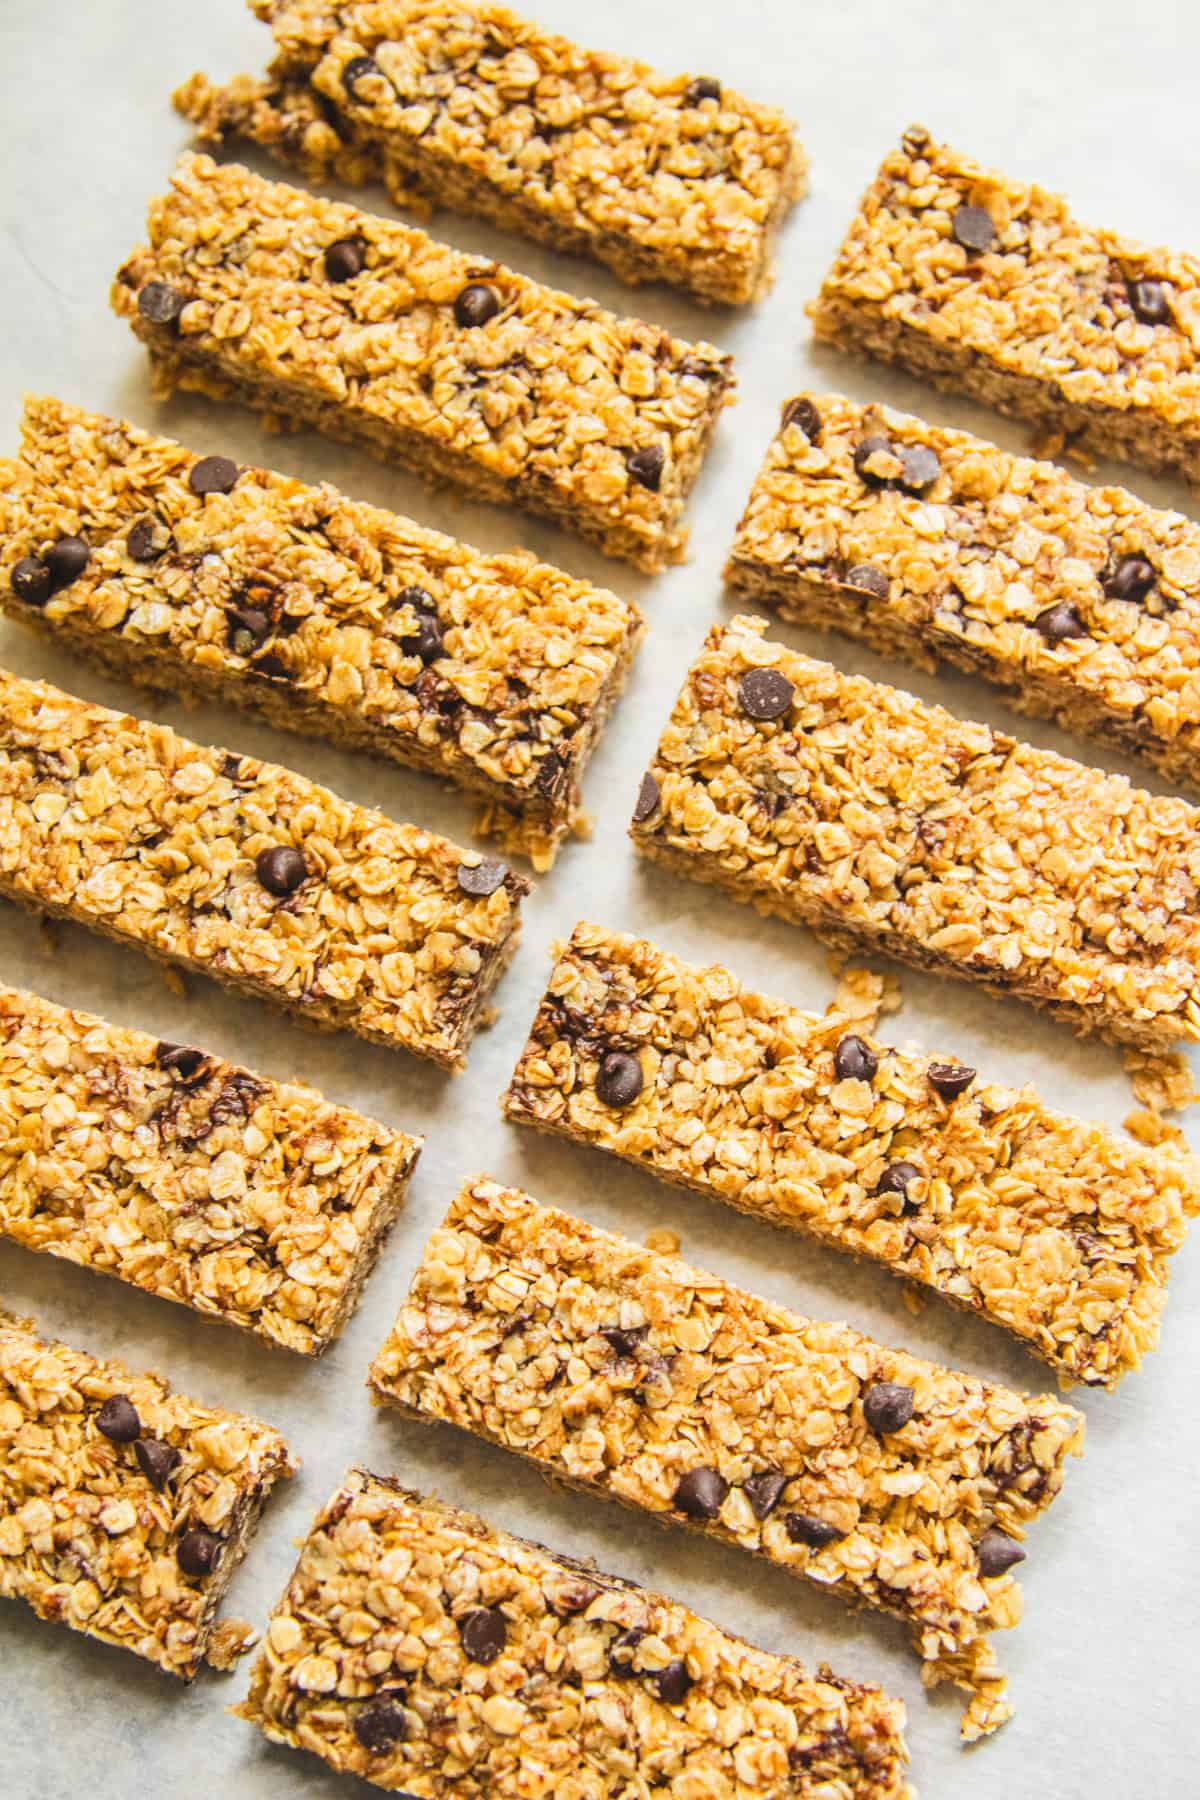
Step 6. Scoop the mixture into your prepared pan. Use the bottom of a measuring cup or glass to firmly press it down until tightly packed. Chill in the fridge for 1-2 hours, then cut into bars.
Helpful Tips
- Press the granola mixture down firmly and make sure it is well compacted so when it is time to slice, the bars hold their shape and do not fall apart.
- I usually use natural peanut butter, but if you want that classic granola bar texture, regular peanut butter with a thicker consistency actually works even better.
- Homemade granola bars can be stored in the refrigerator in an airtight container for up to a week.
- When storing your granola bars, I recommend separating the layers with a piece of parchment paper or wrapping each bar individually so they don’t stick together.
- Want to make more than a week’s supply at a time? You can freeze these granola bars for later!
- I grease my baking dish with coconut oil or butter, but you can use another oil or cooking spray. You can also line the baking dish with parchment paper instead of greasing it.
What I like most about this recipe is how inexpensive it is to make. I buy most of the ingredients in bulk, so when you break it down, we’re really only talking pennies per batch.
And honestly, they’re just plain good. Simple, filling, and something we never seem to get tired of. If you’re anything like me and always have a batch of these on hand, you’ll probably end up making my freshly milled flour vanilla wafers too—they’re just as easy and disappear just as fast.
Recipe FAQs
You can swap out the peanut butter for sunflower butter, or omit it altogether. I’ve made these bars without the peanut butter, and they turn out great!
That depends on the recipe, but I do not bake my homemade granola bars! This simple no-bake recipe just requires melting some of the ingredients on the stove, then refrigerating the bars for a couple of hours.
The best way to make these crunchy is to pre-bake the oats. Just like you are making granola, mix the oats with a little bit of oil and bake them on low for 30 minutes. Allow the oats to cool completely before continuing with the recipe.
This is by far one of my favorite no-bake back-to-school snacks. It works great for breakfast or as a snack, which is perfect for me when I’m in a rush!
And everyone just loves easy-to-grab bars. Similar to my whole wheat strawberry crumble bars. They are so easy to enjoy on the go!
Of course, if I’m not in a rush, I’ll sometimes bake the oats first to give the bars a little extra crunch, but that doesn’t happen too often, haha!
More Easy Snack Recipes
- Baked Pizza Rolls
- Chocolate Chip Banana Bread
- Whole Grain Blueberry Muffins
- The Best Elk Jerky Recipe
- Marinated Soy Sauce Eggs
If you tried this Homemade Granola Bars Recipe or any other recipe on my website, please leave a star rating and let me know how it went in the comments below. Thanks for visiting!

Homemade Granola Bars
Equipment
- 8×10 baking dish
Ingredients
- 3 cups instant oats
- 4 tablespoons butter
- 1/4 cup brown sugar lightly packed
- 3/4 cup peanut butter
- 1/2 cup honey
- 1/4 cup mini chocolate chips
- 1 teaspoon vanilla extract
Instructions
- Grease an 8×10″ baking dish and set it aside.
- Add the oats to a large mixing bowl.
- In a small saucepan, combine the butter and brown sugar. Bring to a low simmer, stirring until the sugar has fully dissolved.
- While the butter is melting, add peanut butter and honey to the oats and mix well until all the oats are coated.
- Pour the melted butter and brown sugar in and mix again. Make sure there are no dry oats.
- Mix in the chocolate chips and vanilla extract until well combined.
- Scoop the mixture into your prepared pan. Use the bottom of a measuring cup or glass to firmly press it down until tightly packed.
- Chill in the fridge for 1 to 2 hours before slicing into bars.
- Store the bars in the refrigerator for up to one week.
Notes
- Press the granola mixture down firmly and make sure it is well compacted so when it is time to slice, the bars hold their shape and do not fall apart.
- I usually use natural peanut butter, but if you want that classic granola bar texture, regular peanut butter with a thicker consistency actually works even better.
- Homemade granola bars can be stored in the refrigerator in an airtight container for up to a week.
- When storing your granola bars, I recommend separating the layers with a piece of parchment paper or wrapping each bar individually so they don’t stick together.
- Want to make more than a week’s supply at a time? You can freeze these granola bars for later!
- I grease my baking dish with coconut oil or butter, but you can use another oil or cooking spray. You can also line the baking dish with parchment paper instead of greasing it.


I love this recipe, thank you! I’m wondering if I can make it without peanut butter?
Thank you, I am so happy to hear you love it! Yes, you can make this without peanut butter, but it does hold up best with some sort of nut butter!
My first time making granola bars, turned out way better than expected. I’m thinking about adding some protein powder next time thoughts?
That’s awesome—glad they turned out so well for your first time! And as far as protein powder goes – I feel like I remember my husband doing this exact thing to them once before! Haha! I’ll have to ask him, but I would say for now, adding a small amount, and maybe a bit more honey or peanut butter if it needs more binding would be a good idea! Definitely let me know how it turns out!